Installing a fire rated exhaust fan in a ceiling is a crucial task that requires careful planning and execution. As a supplier of fire rated exhaust fans, I’ve witnessed firsthand the importance of proper installation for ensuring safety and optimal performance. In this blog, I’ll guide you through the step – by – step process of installing a fire rated exhaust fan in a ceiling, sharing insights and tips based on my experience in the industry. Fire Rated Exhaust Fan

Step 1: Planning and Preparation
Before you start the installation, it’s essential to plan everything thoroughly. First, check the local building codes and regulations regarding the installation of fire rated exhaust fans. These codes may dictate the type of fan you need, its placement, and the requirements for fire – rated ductwork.
Measure the space in the ceiling where you plan to install the fan. Ensure that there is enough room for the fan unit and that the ceiling can support its weight. It’s also important to consider the location of electrical wiring and ventilation ducts. You’ll need to access these during the installation, so make sure you can safely reach them.
Gather all the necessary tools and materials. You’ll typically need a drill, screwdrivers, a utility knife, a stud finder, duct tape, and of course, the fire rated exhaust fan itself. Make sure you have the appropriate type and size of ducts for your fan. These ducts should be fire rated to meet safety standards.
Step 2: Locating the Studs
Use a stud finder to locate the ceiling joists or studs where you’ll mount the exhaust fan. The studs provide a secure base for the fan and help prevent it from sagging or vibrating. Mark the position of the studs on the ceiling using a pencil. This will make it easier to drill the holes for mounting the fan later on.
The fan should be installed in a location that allows for efficient ventilation. Avoid areas close to heat sources or where there may be obstructions to the airflow. Also, take into account the distance to the exterior wall where the exhaust duct will exit. The shorter the duct run, the better the ventilation performance.
Step 3: Cutting the Hole in the Ceiling
Once you’ve determined the exact location for the fan, use a utility knife to score the ceiling material along the outline of the fan housing. Then, use a drywall saw to carefully cut out the hole. Be extra cautious not to cut into any electrical wires or other hidden utilities.
Measure the hole to ensure it’s the correct size for the fan. The hole should be slightly larger than the fan housing to allow for easy installation. If the hole is too small, you may damage the fan or the ceiling during the installation process.
Step 4: Mounting the Fan
Place the fan into the hole in the ceiling. Align the mounting holes on the fan housing with the marks you made on the studs. Use a drill to create pilot holes in the studs at the marked locations. Then, insert screws through the mounting holes on the fan housing and into the pilot holes in the studs. Tighten the screws securely to fasten the fan to the ceiling.
Make sure the fan is level. You can use a spirit level to check and adjust the position if necessary. A properly leveled fan will operate more quietly and efficiently.
Step 5: Connecting the Ductwork
Attach the fire rated ductwork to the exhaust port of the fan. Use duct tape to seal the connection between the fan and the duct. Make sure the tape is tightly wrapped around the joint to prevent air leakage.
Run the ductwork from the fan to the exterior wall. You may need to cut holes in the ceiling joists and the exterior wall to accommodate the duct. When cutting through the ceiling joists, be careful not to weaken their structural integrity. You may need to use a joist protector or a metal sleeve to protect the duct from any sharp edges.
At the exterior wall, attach a vent cap to the end of the duct. The vent cap helps prevent rain, snow, and insects from entering the duct system while allowing the exhaust air to escape.
Step 6: Electrical Connections
Before making any electrical connections, turn off the power at the circuit breaker. This is a critical safety step to prevent electric shock.
Connect the electrical wires from the fan to the electrical supply in the ceiling. Use wire connectors to secure the connections. Make sure the wires are properly insulated and that there are no exposed conductors.
If you’re not comfortable making electrical connections yourself, it’s recommended to hire a licensed electrician. Working with electricity can be dangerous, and a professional can ensure that the connections are made safely and in accordance with the electrical codes.
Step 7: Testing the Fan
Once all the installations are complete and the electrical supply is restored, test the fan. Turn on the power and check if the fan is running smoothly. Listen for any unusual noises or vibrations. If you notice any problems, turn off the fan immediately and investigate the cause.
Check the airflow at the exterior vent cap. There should be a strong and steady stream of air being exhausted. If the airflow is weak, there may be a blockage in the ductwork or a problem with the fan itself.
Step 8: Finishing Touches
After the fan has been tested and is working properly, you can finish the installation by patching and painting any holes or marks in the ceiling. Make sure the area around the fan is clean and free of debris.
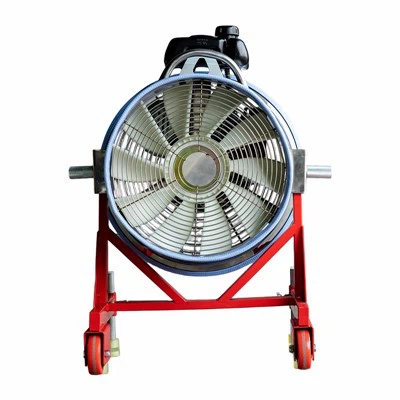
Now that you know how to install a fire rated exhaust fan in a ceiling, it’s important to choose the right fan for your needs. As a supplier of fire rated exhaust fans, I offer a wide range of high – quality products that meet the strictest safety standards. Our fans are designed for optimal performance, durability, and efficiency.
Fire Service Bamboo Ladder If you’re planning to install a fire rated exhaust fan in your home, office, or commercial building, don’t hesitate to contact us for a consultation. We can help you select the right fan based on your specific requirements and provide you with all the necessary information and support for a successful installation. Whether you’re a DIY enthusiast or a professional contractor, we’re here to assist you every step of the way.
References
- National Building Code
- Electrical Safety Standards Manual
- Fire Rated Ventilation Guidelines
Taizhou Mingxin Fire Protection Technology Co., Ltd.
As one of the most professional fire rated exhaust fan manufacturers in China, we warmly welcome you to buy bulk high quality fire rated exhaust fan made in China here from our factory. Good service and low price are available.
Address: Group 3, Xinzhouqiao Community, Jingtai Road Subdistrict, Hailing District, Taizhou City (within Taizhou Station North Logistics Management Co., Ltd.)
E-mail: mingxinxf@163.com
WebSite: https://www.mxfiretech.com/
